A single misbehaving container can drag a homelab to a halt. One Jellyfin transcode, one Immich re-index, one Home Assistant recorder query, and suddenly Pi-hole is dropping DNS and Nextcloud is timing out. The fix is not more RAM. It is caps. Every container gets a memory ceiling, a CPU share, and a block I/O weight, and the noisy neighbour stays in its lane. That is the story an XDA writer recently told after they finally set mem_limit, cpus:, and blkio-weight on every container in their stack. Reliability came from the caps, not the hardware.
We spent the past few weeks running the best apps for Docker container resource management on the three desktop platforms that matter for self-hosters: Windows (via WSL or Docker Desktop), macOS, and Linux. We looked at web UIs, terminal UIs, and full-blown self-host operating systems, and we ranked them on one question. How quickly can you get a cpus: 2.0 and mem_limit: 1g onto every container in one place? These seven earned the install.
What to look for in a Docker resource manager
Not every Docker GUI is built for capping resources. A few things separate the ones worth installing from the ones that just list your containers with pretty icons.
- Per-container CPU and memory limits from the UI, not just from a compose file you edit by hand
- Live stats for CPU, memory, and network per container, so you can spot the piggy before you cap it
- Support for editing a running compose stack in place, including redeployment when limits change
- Access to
docker updateunder the hood, so you can cap a container that is already running without a restart - A clear view of what is set versus unset, because unlimited containers are the ones that will bite you
- Multi-host support if you run Docker on more than one machine (a NAS plus a mini PC is the common case)
Quick comparison
| App | Best for | Platforms | License | Price |
|---|---|---|---|---|
| Portainer | Full GUI control over stacks and limits | Windows, macOS, Linux | Free CE, paid BE | Free / from about $155 per node/year |
| Dockge | Compose-first editing with live stats | Windows, macOS, Linux | Open source | Free |
| Docker Desktop | Native per-container limits on Mac and Windows | Windows, macOS, Linux | Free personal, paid teams | Free / from $9 per user/month |
| CasaOS | Beginner homelab OS with an app store | Linux (Debian/Ubuntu/Pi) | Open source | Free |
| Runtipi | Curated homelab app store with sane defaults | Linux | Open source | Free |
| Yacht | Lightweight web UI for single-host Docker | Windows, macOS, Linux | Open source | Free |
| Lazydocker | Terminal UI for fast triage and CPU/memory checks | Windows, macOS, Linux | Open source | Free |
The apps
1. Portainer, best for full GUI control across every container
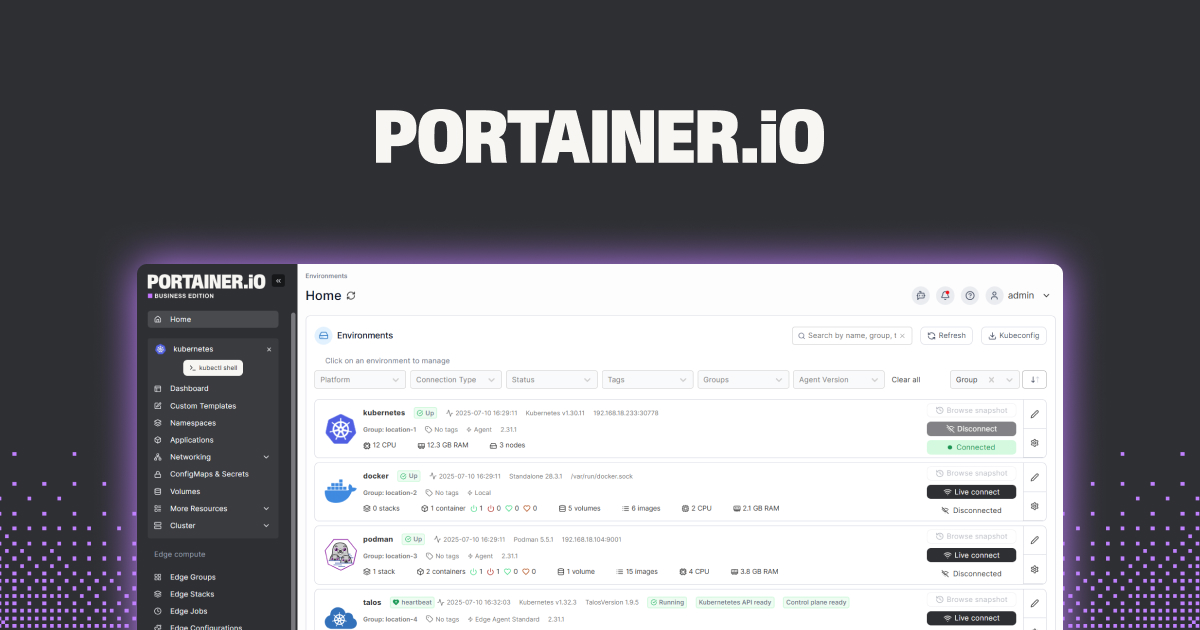
Portainer is the tool most self-hosters land on once their stack grows past four or five containers. The Community Edition is free, runs as a single Docker container, and gives you a browser-based console for every container, image, network, volume, and stack across one or many Docker hosts. For resource capping specifically, the container edit view exposes CPU limit (as vCPU count), memory reservation, and memory limit, and it will hot-apply them via docker update without recreating the container. Stacks (compose files) can be edited inline, and Portainer redeploys them when you save.
The multi-host view is what pushes it past the lighter options. If you run Docker on a NAS and a mini PC, one Portainer install can manage both, and the resource dashboard shows which host is under pressure before you cap anything.
Where it falls short: The free Community Edition drops a few features into a paid Business Edition tier, including per-user RBAC beyond three users and support contracts. It also does not cover block I/O weight from the UI, so blkio-weight still lives in your compose file.
Pricing: Community Edition is free for unlimited nodes. Business Edition starts around $155 per node per year with volume discounts and a free 5-node licence for home use.
Platforms: Runs anywhere Docker runs. On desktop, that is Windows (WSL or Docker Desktop), macOS (Docker Desktop or Colima), and Linux.
Download: Publisher site · GitHub
Bottom line: If you want one dashboard to see and cap every container across every machine you own, Portainer is the default answer.
2. Dockge, best free compose-first manager
Dockge takes the opposite approach to Portainer. Instead of managing containers as first-class objects, it treats compose files as the source of truth. You edit docker-compose.yaml in the browser, hit deploy, and Dockge stops, recreates, and restarts the stack. That is exactly the workflow you want when you are adding mem_limit: 512m and cpus: '0.5' to every service under deploy.resources and want to see the change reflected immediately.
The UI is deliberately spare: a stack list on the left, a compose editor and a terminal on the right, live CPU and memory readouts across the top. It is written by the same developer as Uptime Kuma, so the polish is real, and the install is a single Docker container.
Where it falls short: Single-host only. If you need to manage more than one Docker machine from one screen, Dockge will not do it. It also assumes you are comfortable writing compose files, so it is not the pick for someone who has never seen YAML before.
Pricing: Free, open source under the MIT licence.
Platforms: Runs anywhere Docker runs. Works well on a Linux server accessed from a Windows, macOS, or Linux browser.
Download: GitHub
Bottom line: The best free pick if your containers already live in compose files and you want to cap them there without leaving the browser.
3. Docker Desktop, best built-in option on Windows and macOS
Docker Desktop ships with resource controls that most users never open. On Windows and macOS, the Resources pane caps the whole Docker VM (memory, CPU, swap, disk image size), which is your safety net for keeping Docker itself from eating your laptop. On top of that, individual container limits still work as always through the CLI, compose files, and the desktop UI’s container edit dialog on recent versions.
The reason it is on this list is that it is already installed on most desktop machines. If you have not yet gone through Docker Desktop’s Settings and set a hard memory and CPU ceiling on the engine, do that first. Every container cap below sits on top of that outer bound.
Where it falls short: The engine-wide limits are the star of the show; per-container editing in the desktop UI is functional but sparse. On Linux the desktop app is optional, most people use the daemon directly. Business use above 250 employees or $10M revenue requires a paid subscription.
Pricing: Free for personal use, education, small business, and open source. Pro is $9 per user per month, Team $15, Business $24.
Platforms: Windows, macOS, Linux.
Download: Docker.com
Bottom line: Set the engine-wide cap first, then use one of the other tools for per-container limits. Free for most home users.
4. CasaOS, best beginner homelab pick
CasaOS is a full self-host operating system layer that sits on top of Debian, Ubuntu, Raspberry Pi OS, or similar. Install it with a one-line script and you get a phone-like home screen, an app store of one-click installers (Jellyfin, Immich, Pi-hole, Home Assistant, and about 150 others), and a container view that shows CPU and memory per app in real time. For each installed container, you can open the settings and set a memory limit, CPU shares, and port and volume mappings without touching a compose file.
It is the tool we would put in front of a friend who bought a mini PC to run Plex and Home Assistant and has never opened a terminal. The caps are one slider away, and the UI makes it obvious which containers are unbounded.
Where it falls short: Single-host, Linux-only, and opinionated. The app store curates a specific set of images, so bespoke or off-catalogue containers work through the compose importer but do not benefit from the one-click UX. Development pace has slowed compared with a couple of years ago, though the project is still actively maintained.
Pricing: Free, open source under the Apache 2.0 licence.
Platforms: Linux only (Debian, Ubuntu, Raspberry Pi OS, Fedora, Arch). Access from any desktop browser.
Download: Publisher site · GitHub
Bottom line: The easiest way to run a small homelab with sensible per-app caps if the machine is a dedicated Linux box.
5. Runtipi, best curated homelab alternative to CasaOS
Runtipi covers the same ground as CasaOS (app store, one-click installs, per-app settings) but feels more modern and moves faster. The app store now spans several hundred containerised apps, all packaged with sensible defaults, environment variables surfaced in the UI, and resource settings exposed per app. The caps you set in the app config translate to standard Docker limits at deploy time.
We prefer Runtipi to CasaOS when the user is happier reading docs, since the settings surface more knobs. It also has better support for multiple architectures and a cleaner update flow.
Where it falls short: Also single-host and Linux-only. Apps that are not in the store still need a compose file, imported through a custom app definition. The community is smaller than Portainer’s or CasaOS’s, so obscure integrations take more digging.
Pricing: Free, open source.
Platforms: Linux (Debian, Ubuntu, and derivatives). Browser access from any desktop.
Download: Publisher site · GitHub
Bottom line: The pick if CasaOS feels a step too simple and Portainer feels a step too raw.
6. Yacht, best lightweight web UI
Yacht is a smaller, faster web UI in the same space as Portainer, aimed at users who want a clean container list, one-click templates, and a settings pane that includes CPU and memory limits without the extra surface area of stack management or multi-host orchestration. Templates live in JSON files and can be community-shared, which makes it easy to deploy an image with sensible caps baked in.
For a single Docker host where you mostly care about starting, stopping, capping, and updating containers, Yacht is quicker to learn than Portainer and keeps the whole flow inside two or three screens.
Where it falls short: Development is much slower than Portainer’s or Dockge’s, and the project has been in a long beta. Multi-host is not on the roadmap. Some newer Docker features land later here than in the bigger tools.
Pricing: Free, open source.
Platforms: Runs anywhere Docker runs. Browser access from any desktop.
Download: GitHub
Bottom line: A tidy web UI for a single Docker host when Portainer feels like overkill.
7. Lazydocker, best terminal UI for fast triage
Lazydocker is not a manager, it is a monitor with hands. Launch it in a terminal and you get a keyboard-driven view of every container with live CPU, memory, block I/O, and network graphs, plus stats panes, logs, and a shell shortcut. When one container is spiking, lazydocker shows you which in seconds, and you can restart, stop, or open a shell without leaving the pane.
For actually setting limits, you drop into a shell (e opens the container in $EDITOR or docker exec) and use docker update --cpus 2 --memory 1g <name> or edit the compose file. It is the tool you keep in a tmux split next to whatever web UI is your main.
Where it falls short: No editing UI for compose or run limits, you have to type the CLI. Docker only, no Kubernetes.
Pricing: Free, open source under the MIT licence.
Platforms: Windows (via WSL or PowerShell), macOS, Linux. Installs via Homebrew, Scoop, Nix, or a Go binary.
Download: GitHub
Bottom line: The fastest way to see which container is misbehaving right now, and to run the docker update that caps it.
How to pick the right one
- If you run Docker on more than one machine and want one dashboard: Portainer.
- If your stacks already live in compose files: Dockge.
- If you use Docker Desktop and want to start with the safest cap first: Docker Desktop’s Resources pane, then layer another tool on top.
- If you or someone you are helping is new to homelabs: CasaOS.
- If CasaOS feels too simple and Portainer too raw: Runtipi.
- If you want the least-heavy web UI on one host: Yacht.
- If you live in a terminal and want a real-time picture of what is eating CPU: Lazydocker.
Most self-hosters end up with two. A web UI for setting caps and reading state, plus Lazydocker in a spare terminal for the moment a container starts misbehaving.
FAQ
What is the best free app to manage Docker containers on desktop?
Portainer Community Edition is the strongest free pick because it covers container editing, stacks, multi-host, and live stats in one browser UI without a paywall. For a compose-first workflow, Dockge is the better free choice.
How do I set a CPU and memory limit on a Docker container?
In a compose file, add deploy.resources.limits.cpus: '2.0' and deploy.resources.limits.memory: 1G under the service, or use the older top-level cpus: 2.0 and mem_limit: 1g. On a running container, docker update --cpus 2 --memory 1g <name> applies the change without a restart. Portainer, Dockge, CasaOS, Runtipi, and Yacht all expose these settings in the UI.
Can Docker Desktop cap individual containers?
Docker Desktop’s Resources pane caps the whole Docker VM on Windows and macOS, not individual containers. Per-container caps still come from compose files, docker run flags, or a manager like Portainer that runs on top of the same engine.
Is Portainer or Dockge better for a homelab?
Portainer if you have more than one Docker host or you want a full container manager. Dockge if all your services already live in compose files on a single host and you want the fastest editing loop. Many homelabbers install both and use each for what it does best.
What is the difference between CasaOS and Runtipi?
Both are one-line-install homelab OS layers with a curated app store and per-app resource settings. CasaOS is more beginner-friendly with a slower pace of change; Runtipi surfaces more configuration and ships new apps faster. Try CasaOS first if simplicity matters, Runtipi if you plan to tweak things.
Do these tools work over WSL on Windows?
Yes. Any of the seven runs in a container on a Docker engine inside WSL 2, and you access the web UI from a Windows browser at localhost. Lazydocker also runs directly inside the WSL shell.